
I want to make a robot myself !!
I want to build a robot: Where should I start?
Hello, dear colleagues,
Building your own robot is a rewarding way to learn electronics, mechanics and software in one project. Start with a measurable task, such as a small robot that moves after a start command and stops when it detects an obstacle. This makes the essentials of robotics tangible: gathering information from the surroundings, evaluating it and producing movement.
1. Define the task and a measure of success
Replace “I will build a robot” with “It will move slowly on a level surface, detect an obstacle ahead and remain stopped until restarted.” The operating environment, size, payload and expected battery runtime all affect component selection. When comparing robot types, keep your first project focused on this task.
Your measure of success should be repeating the same behavior consistently. Getting a motor to turn once and achieving reliable robot operation are different milestones. Perception, decisions and movement need to be checked together.
2. Match the basic components to the task
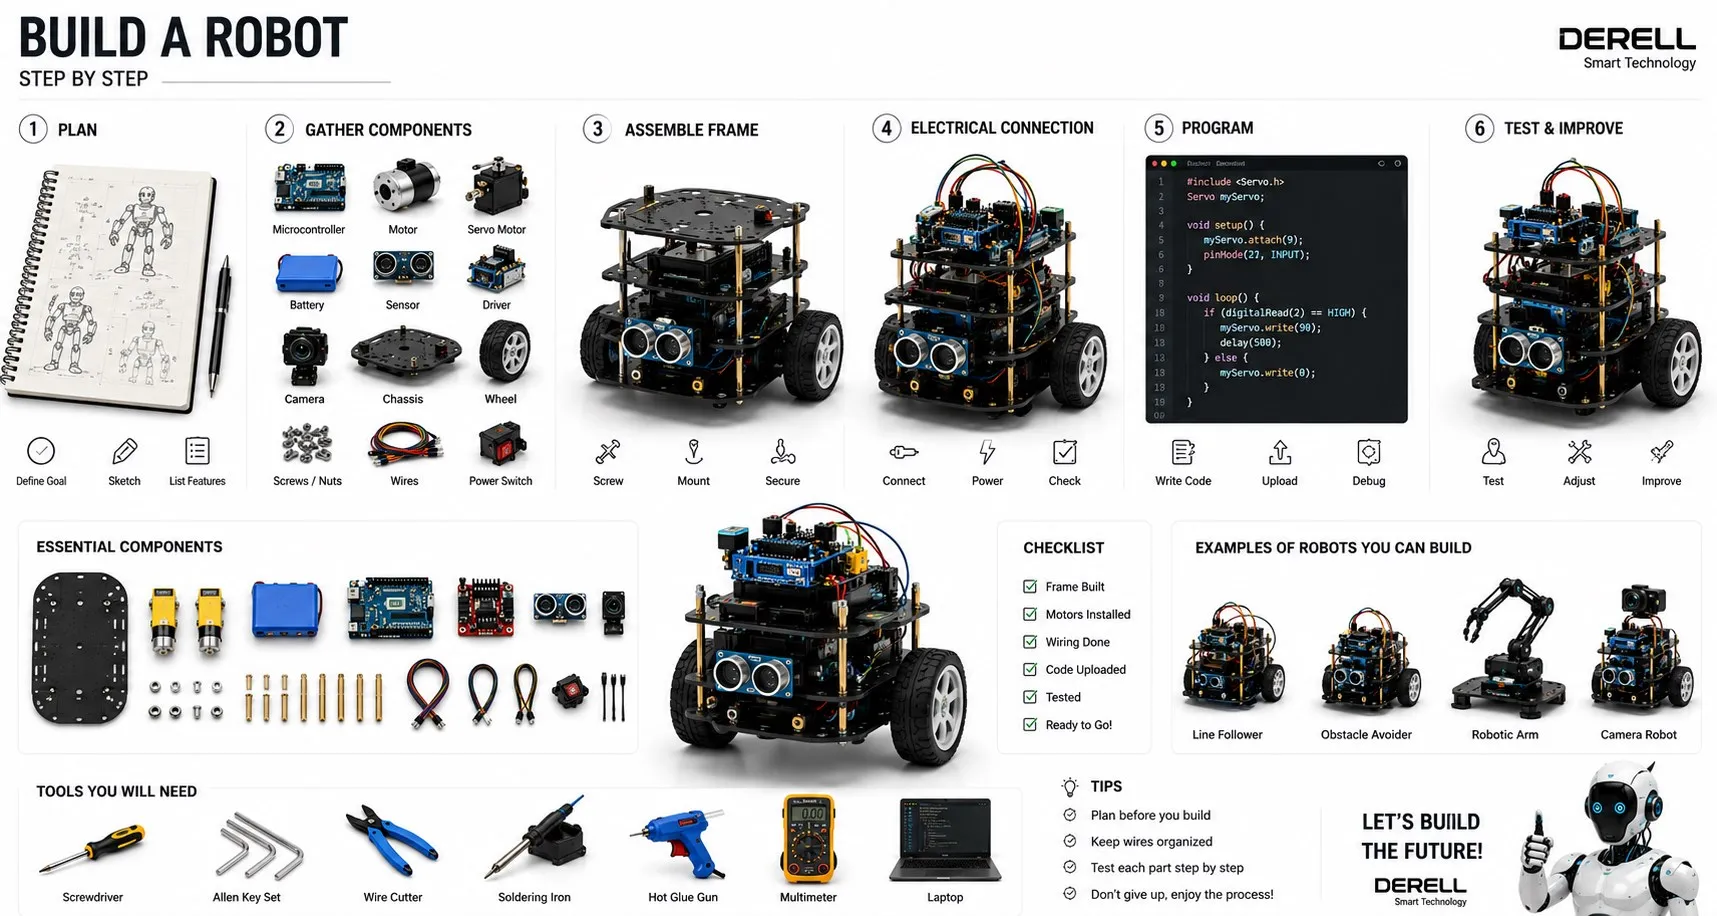
A starting set for the two-wheel example could include two geared DC motors, drive wheels and a caster, a chassis, a microcontroller board, a suitable dual-channel motor driver module, a distance sensor, a power source and connection hardware. You can then learn the roles of the main robot components through a working application.
The controller board makes decisions; the motor driver manages the electrical power delivered to the motors. Sensors and actuators provide the physical connection to the environment. Before purchasing, check electrical and mechanical compatibility; matching connectors alone do not establish compatibility.
3. Distinguish a microcontroller from a computer
Microcontroller boards such as the Arduino Uno and Raspberry Pi Pico can handle tasks such as reading sensors and controlling motors. Arduino development is based on C++, while Pico supports C/C++ or MicroPython. A Raspberry Pi 4/5 is a single-board computer capable of running an operating system; it belongs to a different category from Pico.
Adding a computer can make sense when you need image processing or a more advanced interface. For your first robot, let I/O requirements, sensor support and learning resources guide board selection. Choosing a PLC for an industrial application also requires consideration of environmental conditions, communications and machine control requirements.
4. Select a motor for the required movement
A geared DC motor can drive a wheeled robot, with a suitable driver providing speed and direction control. A stepper motor produces movement in steps, but can miss steps under excessive load. A small position-controlled hobby servo can move a mechanism to a specified angle. Continuous-rotation hobby servos behave differently.
Consider torque, speed, wheel diameter and the robot's weight together. PWM, applied through a suitable driver, can help vary a DC motor's power and speed; the same PWM setting does not guarantee the same speed under a changing load.
5. Arrange power and wiring correctly
Do not power a motor directly from a GPIO pin. The control pin sends a signal to the driver; a suitable power source supplies the motor's energy. When selecting a driver, consider operating voltage, startup and stall current, continuous current capacity and protection features. The motor's no-load current alone is insufficient.
Check the board's and sensor's logic voltage: 3.3 V and 5 V interfaces are not always directly compatible. For non-isolated connections, provide the required common reference according to the manufacturer's wiring diagram. Ohm's law helps explain basic circuits, but does not describe a motor's dynamic current by itself.
Use a low-voltage DC supply for a beginner project. Disconnect power before wiring, then check polarity and connections. Verify the supply by measuring DC voltage. Use a breadboard for low-current experiments and select appropriately rated wires and connectors for motor power circuits.
6. Make the mechanics robust and accessible
Chassis rigidity, motor alignment and weight distribution affect how smoothly the robot travels. Secure the battery and boards, and keep wires clear of wheels and gears. Leave connections accessible for maintenance. A loose connector or cold solder joint can cause intermittent faults that resemble software problems. Reliable assembly matters as much as the program.
7. Divide the program into clear states
In robot programming, verify sensor readings and motor commands separately first. Then consider a state machine with “Wait”, “Move” and “Stop” states. After a start command, move only when the sensor reading is valid and the path is clear. Stop movement when an obstacle, a stop command or invalid sensor data is detected. Test detection range, travel speed and stopping distance together.
Define restart behavior clearly: removing an obstacle should not automatically restart the robot; it should wait for a new start command. At power-up or after a board reset, software and driver inputs must work together to prevent unintended movement. Use a regular control cycle rather than long delays that prevent sensor checks. This basic example should not be treated as an industrial safety function.
8. Test the components in sequence
Check program uploading first, followed by sensor readings. Secure the robot on a stable support with its wheels clear of the surface, then test one motor and both motors at low speed. Finally, test movement, obstacle detection and stopping together in a level, contained area. Changing one variable at a time makes faults easier to isolate.
If the board resets when a motor starts, investigate supply voltage dips, connections and electrical noise. If the robot veers to one side, check mechanical alignment, motor differences and wheels. Understanding the limitations of robotics technology helps you avoid treating every fault as a coding problem. For robot safety, an accessible means of disconnecting power and protection from moving parts are also part of the design.
9. Add features to a working foundation
Once the basic robot operates consistently, you can add speed feedback with an encoder and explore PID control with Arduino. Feedback helps compare actual movement with a target. Adding a camera or machine learning introduces new data and processing requirements. Use artificial intelligence when its contribution to the task can be measured.
Can I earn money by building and selling robots?
Robotics skills can generate income, but a working prototype does not automatically become a marketable product. Educational kits, prototypes for specific tasks, programming, documentation and maintenance within your area of competence offer different types of work. In industrial robot applications, site integration and validation carry broader responsibilities than a hobby project.
Total cost includes components, assembly, software development, testing, packaging, delivery and after-sales support. Establish the customer's problem and acceptance criteria at the outset. The difference between component cost and selling price is not all profit. Competition prizes should not underpin an assumption of regular income either. The relationship between robotics and employment also highlights the value of technical skills beyond product sales.
Before delivery, prepare a wiring diagram, parts list, software version, operating limits and maintenance information. Requirements applicable to the product and its intended market also need evaluation. For projects involving cameras or personal data, robotics ethics and privacy matter too. A sustainable business depends on consistently delivering what was promised to the customer.
Technical references: Arduino: motor control basics · Raspberry Pi: microcontrollers · Raspberry Pi: computer hardware · Pololu: motor and power supply selection.
This page provides a general starting roadmap. For a specific board, motor and driver, follow the manufacturer's wiring diagram and electrical limits. You may share it with attribution.